Venipuncture Blood Draw
Key Points
- Verify order, patient identity, and bleeding or allergy risks before needle insertion.
- Screen for prior vasovagal symptoms during blood draws and position supine when indicated for safety.
- Use aseptic site preparation and maintain tourniquet time at 2 minutes or less.
- Follow correct tube order of draw, inverting tubes appropriately and labeling at bedside.
- Antecubital veins are common for blood draws due to larger vessel size and repeat-draw tolerance, but they are less preferred for indwelling peripheral IV therapy because elbow flexion can obstruct catheter flow.
Equipment
- Clean gloves and additional PPE as indicated
- Antiseptic agent (alcohol, chlorhexidine, or povidone-iodine)
- Vacutainer adapter/holder (Luer-lock compatible) or syringe setup, venipuncture needle/winged device, and single-use tourniquet
- Needle options matched to vein/access needs:
- Vacutainer needle (direct tube collection)
- Butterfly/winged infusion set (small or fragile veins)
- Multiple-draw needle (sequential tubes without repeat puncture)
- Common gauges: 21G, 22G, 23G (site and vein dependent)
- Sterile, color-coded vacutainer tubes selected for ordered tests, labels, gauze, dressing, biohazard transport bag, and sharps container
Procedure Steps
- Verify provider order, review chart for bleeding risk and allergies, perform hand hygiene, confirm two patient identifiers, and assess prior faintness/nausea with blood draws (use supine positioning when risk is present).
- Position the arm, inspect and palpate veins, and prioritize straight, visible, palpable veins (often antecubital for routine draws). Consider nondominant arm and alternate sites (dorsal hand, wrist, forearm) when needed, avoid scarred/thrombosed/damaged veins, and use a warm compress briefly if veins are poorly prominent.
- Apply tourniquet above the selected site while confirming distal pulse and comfort; tighten enough to engorge veins without causing pain or arterial compromise.
- Cleanse site with single-use antiseptic applicator and allow complete drying before puncture.
- Anchor vein, insert needle bevel up at about 30 degrees, start collection, and release tourniquet once blood flow begins.
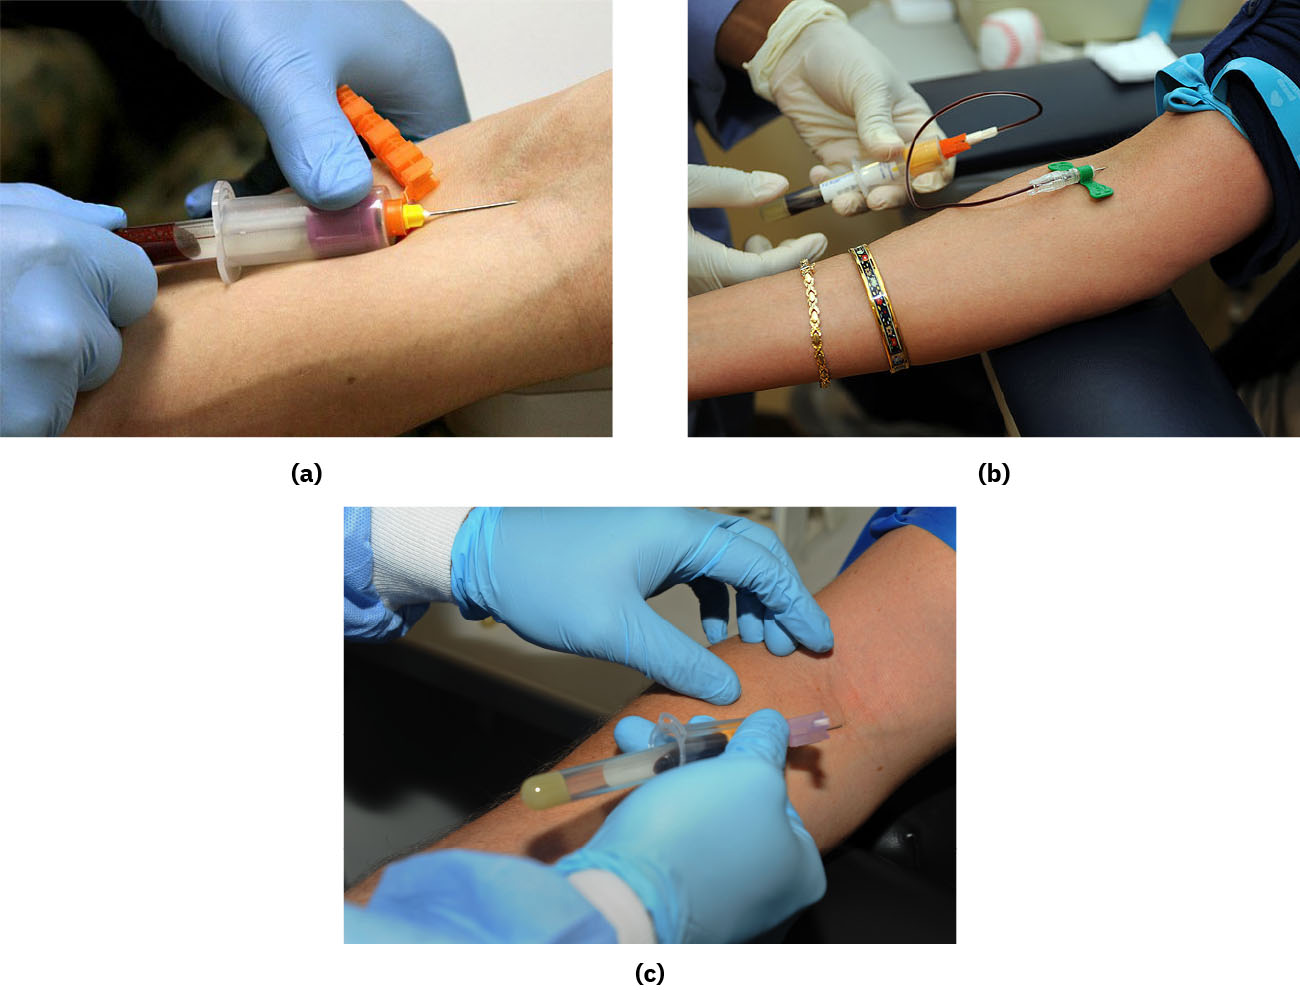 Illustration reference: OpenStax Clinical Nursing Skills Ch.10.
 - Fill tubes in proper order of draw; for vacutainer systems, seat each tube fully in the holder so the stopper is pierced and tube vacuum pulls blood, then invert per additive guidance.
- Place gauze at site, disengage tube, and remove needle from vein (do not remove needle while a collection tube remains attached in the holder); then activate safety device and apply pressure/dressing.
- If a syringe is used, transfer specimen immediately to collection tubes, gently invert per additive requirements, label in the patient’s presence, and transport immediately per policy.
- Dispose sharps safely, reassess patient, and document all required findings.
Documentation Cues
- Site/location of vein used, site appearance, and dressing status.
- Date/time of draw and specimen set collected.
- Patient teaching and tolerance/response.
- Unexpected outcomes, interventions, provider notification, and follow-up communication of laboratory results when applicable.
Common Errors
- Leaving the tourniquet on too long or failing to release when flow begins → hemoconcentration and specimen quality risk
- Labeling away from bedside or delayed transport → identification and preanalytical error risk
Related
- peripheral-iv-access - Shared vascular access assessment and insertion safety principles.
- blood-sampling-modalities-and-preanalytical-safety - Bedside labeling prevents high-harm identification errors.